GUIDE TO USING MARA
This page provides the information you will need to use MARA 3.4.
INSTALLING MARa
1. First install Claris FileMaker Go 19 on your iPad.
MARA utilises Claris FileMaker Go 19, formerly Claris Filemaker Go software platform which many developers use to base their products on. This app is free for end users on iPads. Go to the Apple app store in your country and download the latest version of Claris FileMaker Go onto your iPad to start. If you have an older iPad the new versions of Claris FileMaker Go may not open, so you may need to use earlier versions (16, 17, or 18 versions are most suitable). MARA will still work, but some of the features might not be available. Please be aware that some iPads earlier than 10.2 versions may not enable FileMaker Go.
If you are having trouble with installing Claris FileMaker Go, you might want to update your iPad software, and/ or turn off the iPad and restart it.
2. If you have a previous version of MARA on your iPad, you will need to delete this version first, as the iPad will keep opening the old version and with this it will block the new version. The latest version, 3.4, is split into two files. Please make sure you download both files.
3. Download MARA.fmp12 and MARAData.fmp12. Version 3.4 allows you to update and save your MARAData.fmp12 frequently. It does not matter in which order you download the two files. In step 4 we will explain to you why it is important that you download the latest version with both files.
4. Open both MARA files (MARA.fmp12 and MARAData.fmp12) in Claris Filemaker Go. Please make sure that both files do not have a number added (for example MARA2) to them since the app won’t work otherwise. If one or both of the MARA files have a number added to it, go into your download folder and rename them before you open them in your Claris Filemaker Go.
Open Claris FileMaker Go and MARA should make itself evident. If it does not, look for the downloads folder on your iPad and then tap MARA by clicking on and select ‘Copy to FileMaker Go’.
Once you open MARAData you will see this page:
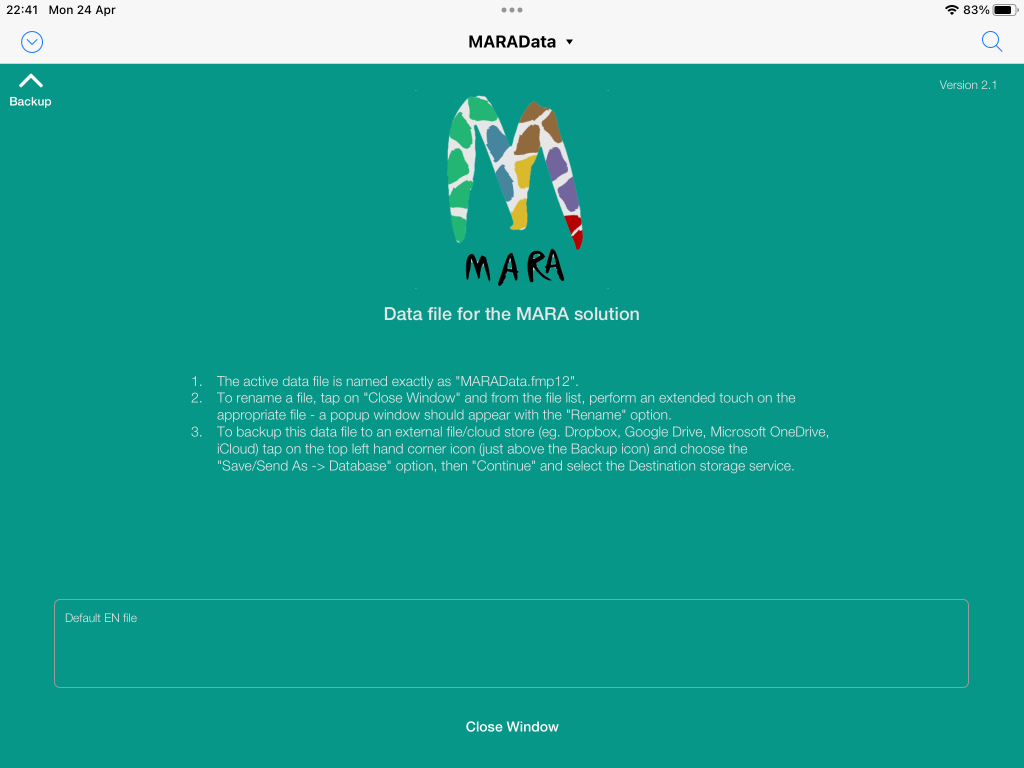
After reading it, you can close this window at the bottom with ‘Close Window’.
Every time you want to save a backup of your MARAData you can tap on the arrow in the top left corner, go onto ‘Save/ Send As’. These are the screens you will see:
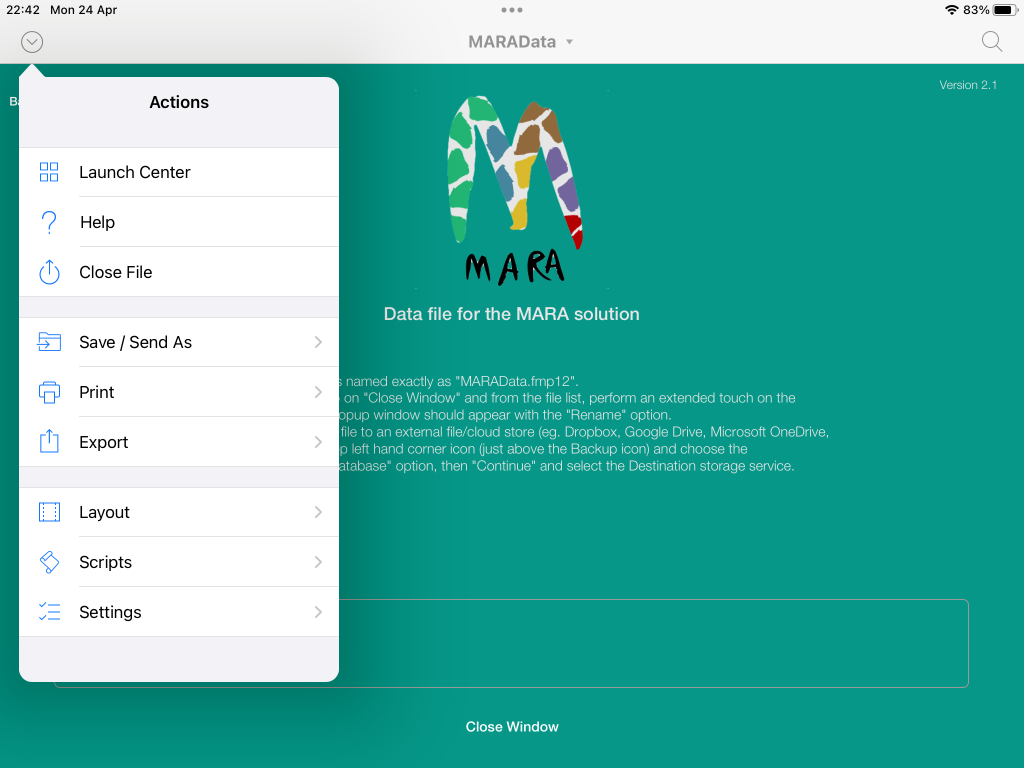
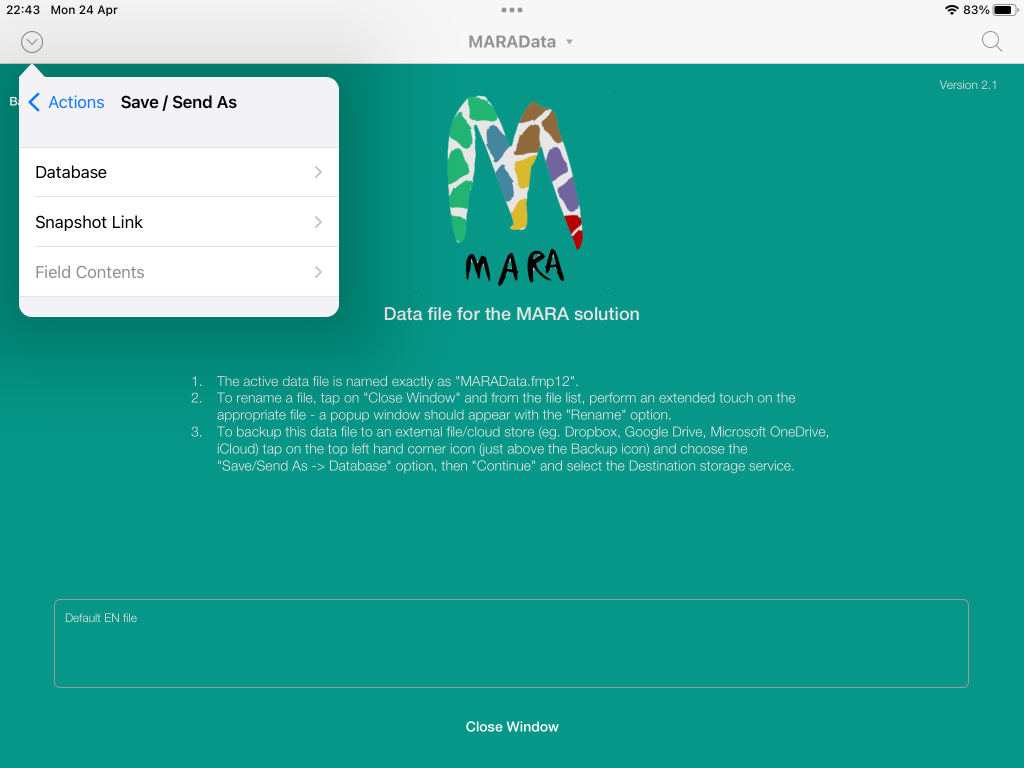
You can tap on ‘Save / Send As’ and choose ‘Database’. This is the screen you will see:
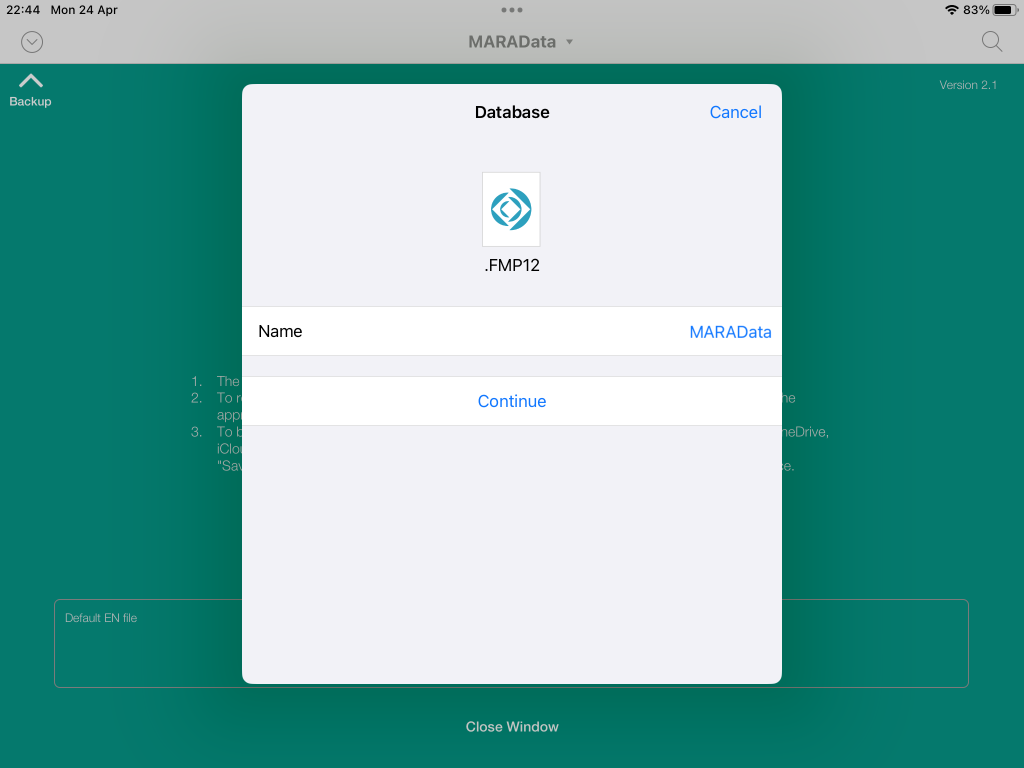
Once you agreed to continue, you will be able to choose where you want to save a copy of your MARAData:
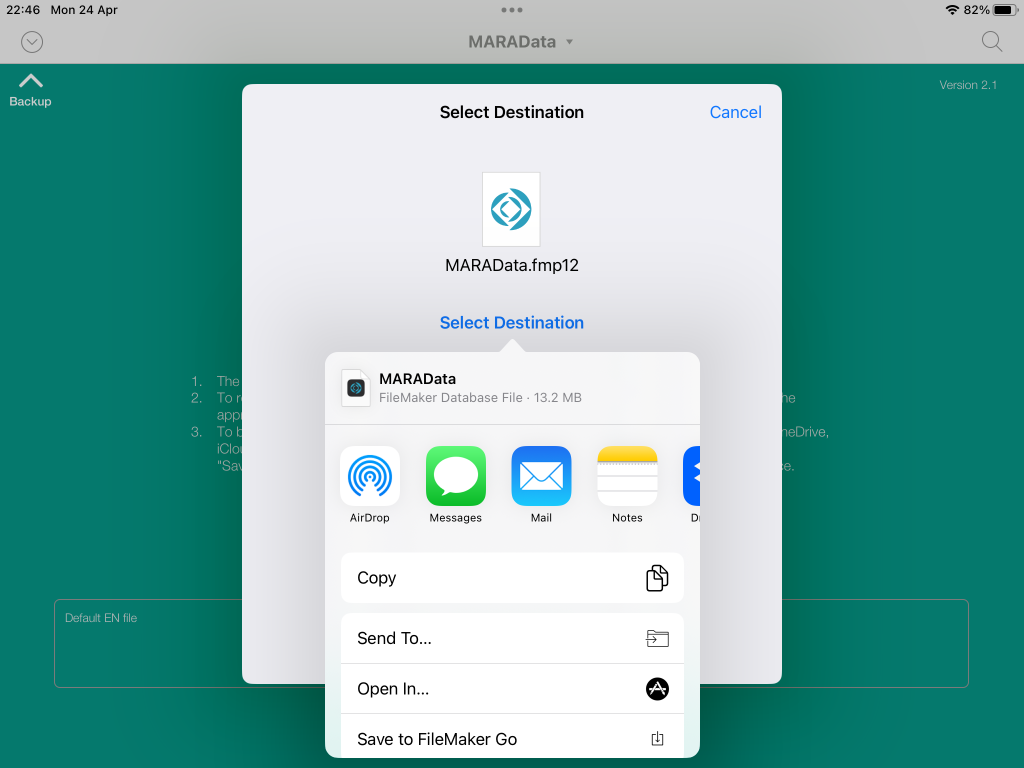
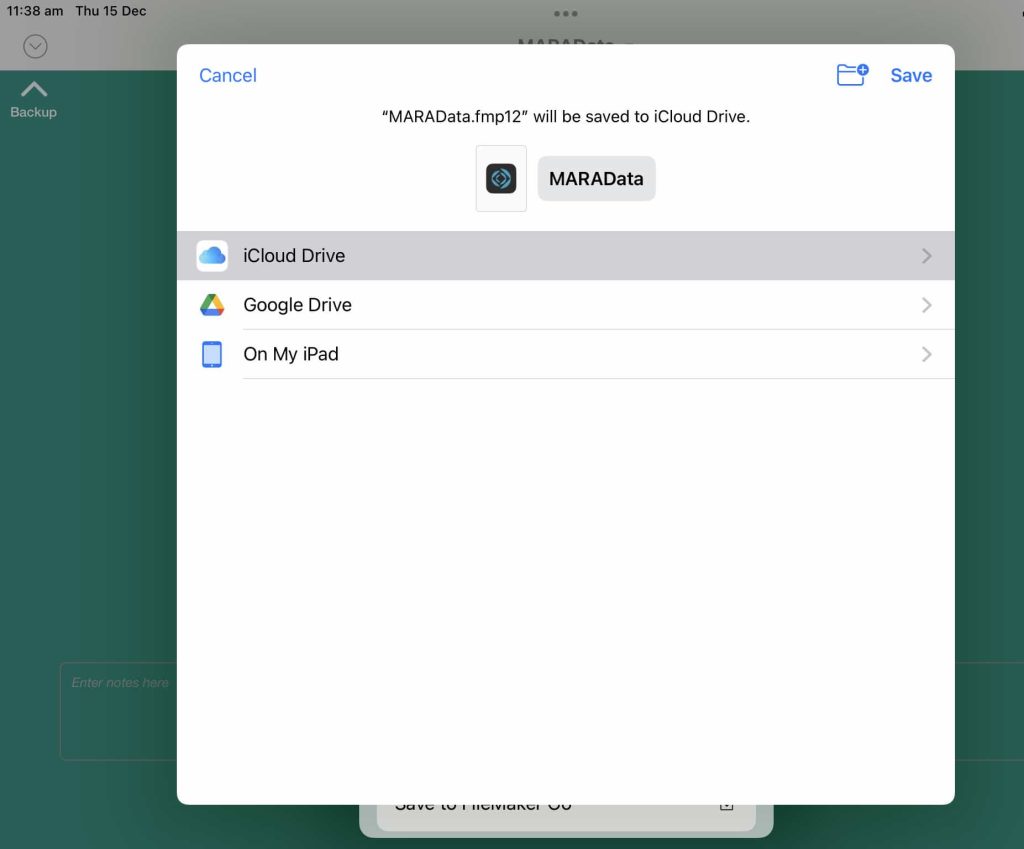
By regularly saving your MARAData you can make sure not to lose any of your gathered data.
5. Entering MARA and registering as a user
On opening MARA, an entry page will appear. Sign in as Kim Dunphy first (KD) with the code 1111. Then you can choose Sign in as Guest, unless you already have created an account.
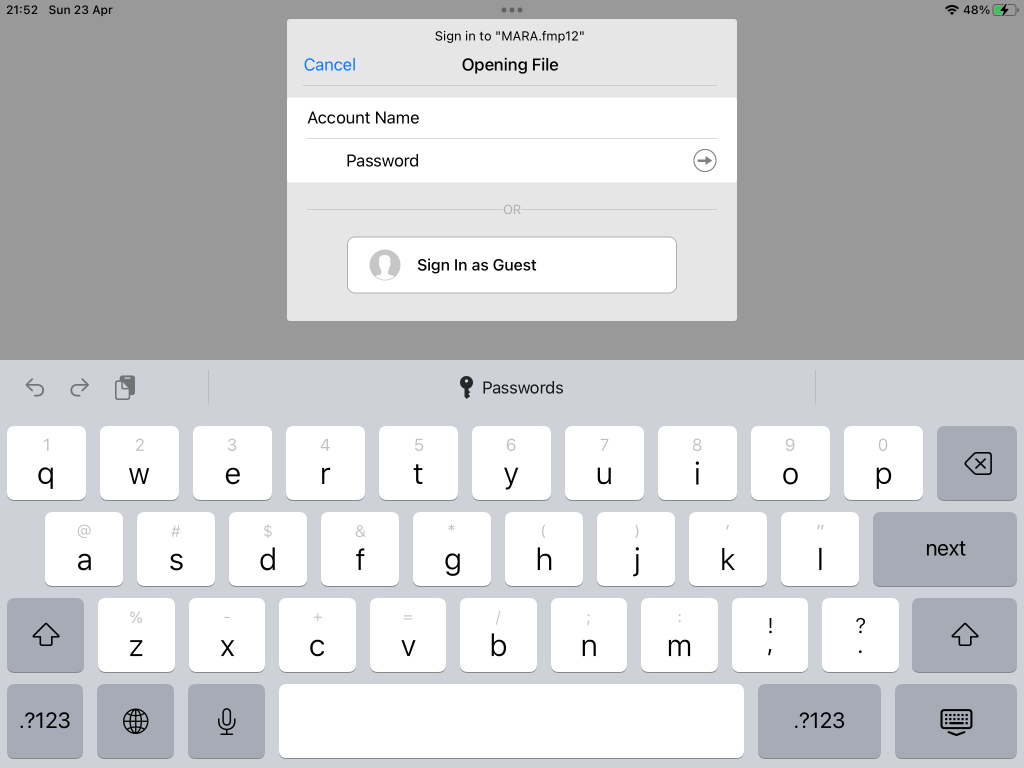
When you create an account, please enter your first and family names, email address and select a four-digit pin number. Please make a good record of this number. A registration email will come up. Please click on the send button so you can be registered as a user. This will enable us to contact you about future developments of MARA. The next time you launch MARA, you will find your name and initials. Click on the initials and you will be asked to enter your four-digit pin number.
MARA USERS’ Information
This section offers information about the practical and technological aspects of using MARA. Download MARA manual here. The manual is based on version 3.0 and will be updated shortly.
MARA manual should be read in conjunction with the manual of the Outcomes Framework for DMT that explains the objectives for assessment that underpin MARA and principles of planning, assessment and evaluation to be used with MARA. Find the Outcomes Framework here.
videos
All the videos are based on version 3.0 and will be updated gradually.
![]() Video: Introducing MARA app (5 mins)
Video: Introducing MARA app (5 mins)
![]() Video: MARA functions overview (5 mins)
Video: MARA functions overview (5 mins)
![]() Video: Groups function (4 mins)
Video: Groups function (4 mins)
![]() Video: Sessions function (2 mins)
Video: Sessions function (2 mins)
![]() Video: Outcomes Framework (8 mins)
Video: Outcomes Framework (8 mins)
![]() Video: Numerical assessment of a participant
Video: Numerical assessment of a participant
![]() Video: Using media options for assessment
Video: Using media options for assessment
![]() Video: How to select and set objectives in MARA
Video: How to select and set objectives in MARA